The Location of the Main Subject(s)
You will note that in the photo above the main subject (flower) is close to the
edges. When we wrap your print around the frame, we require 40mm of the photo on
each edge to go around the sides.
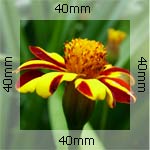
(example based on 32mm frame depth)
You will see here that we lose some of the flower from the front of the print, but
this doesn't have a big impact on the look of the canvas.
You may however prefer to have the entire flower on the front. In this case, we
can wrap a plain coloured border around the frame instead.
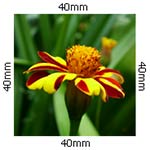
(example based on 32mm frame depth)
This border does not have to be white, it can be a colour more suitable for
the photo if need be.
There are a couple of other techniques that we can use to retain the whole picture on the front. The first is to take a mirrored copy of the edge of the photo and reflect that on the sides.
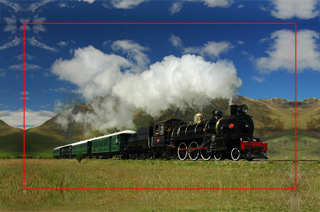
We can also stretch the edges around the frame. These options will depend on the photo, and may not be suitable for some pictures with for instance, people that are close to the edge.

Or alternatively we can blur the edges, which is similar to mirroring, however
this time the edge is blurred to keep the same colours, but without the distinct
details.
